
The Ultimate Crusty Italian Bread Recipe (Foolproof & Bakery-Quality)
Table of Contents
Experience the magic of homemade bread with this authentic crusty Italian bread recipe that delivers bakery-quality results every single time.
Introduction
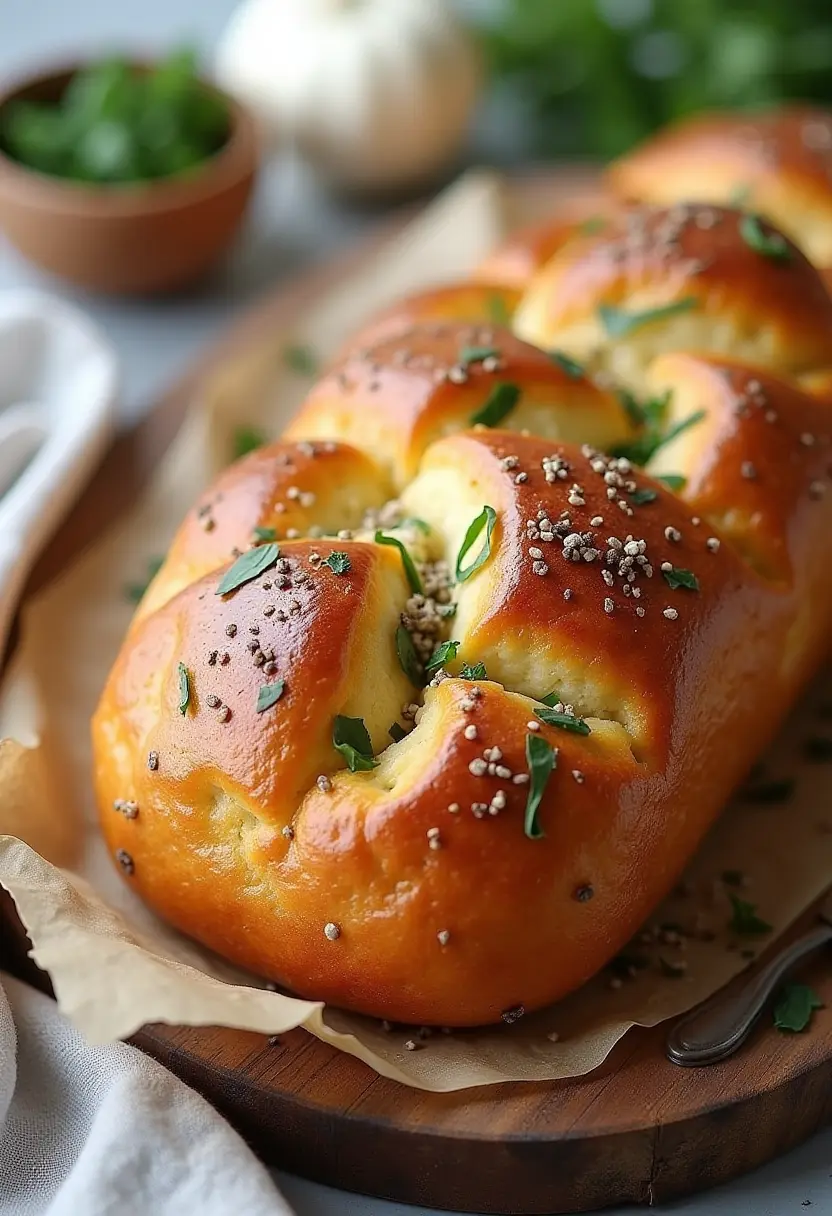
Picture this: the intoxicating aroma of freshly baked bread wafting through your kitchen, the satisfying crack of a golden crust as you slice into it, and that perfect contrast between the crispy exterior and pillowy-soft interior. This crusty Italian bread recipe isn’t just another bread recipe—it’s your gateway to creating authentic, artisan-quality loaves that rival those from the finest Italian bakeries.
What sets this easy crusty italian bread recipe apart from countless others? It’s the careful balance of traditional techniques with modern home-baking practicality. After years of perfecting this recipe, I’ve discovered the secrets that transform simple ingredients into extraordinary homemade crusty italian bread. Whether you’re a novice baker or seasoned pro, this foolproof method will have you creating rustic masterpieces that’ll make your neighbors wonder if you’ve opened a bakery.
The beauty of authentic italian bread lies in its simplicity—just flour, water, yeast, and salt—yet achieving that signature crackling crust and chewy crumb requires understanding a few key principles that I’m excited to share with you.
Why This Recipe Works: Secrets to the Perfect Crust
Creating truly exceptional rustic italian bread isn’t magic—it’s science. Here are the fundamental principles that make this recipe consistently successful:
High Hydration for Maximum Flavor: This recipe uses a 75% hydration ratio, meaning the water content is 75% of the flour weight. This higher moisture content creates those beautiful irregular holes in the crumb and contributes to a more complex flavor profile.
Steam is Your Secret Weapon: The key to achieving that coveted crackling crust lies in creating steam during the first 15 minutes of baking. Steam keeps the surface of the dough flexible, allowing maximum expansion before the crust sets.
Slow Fermentation Develops Character: Unlike quick breads, this italian bread bread benefits from a long, slow rise that develops complex flavors through natural fermentation. The extended fermentation also creates better texture and digestibility.
Temperature Control: Proper temperature management—from ingredient temperatures to oven heat—ensures consistent results every time you bake.
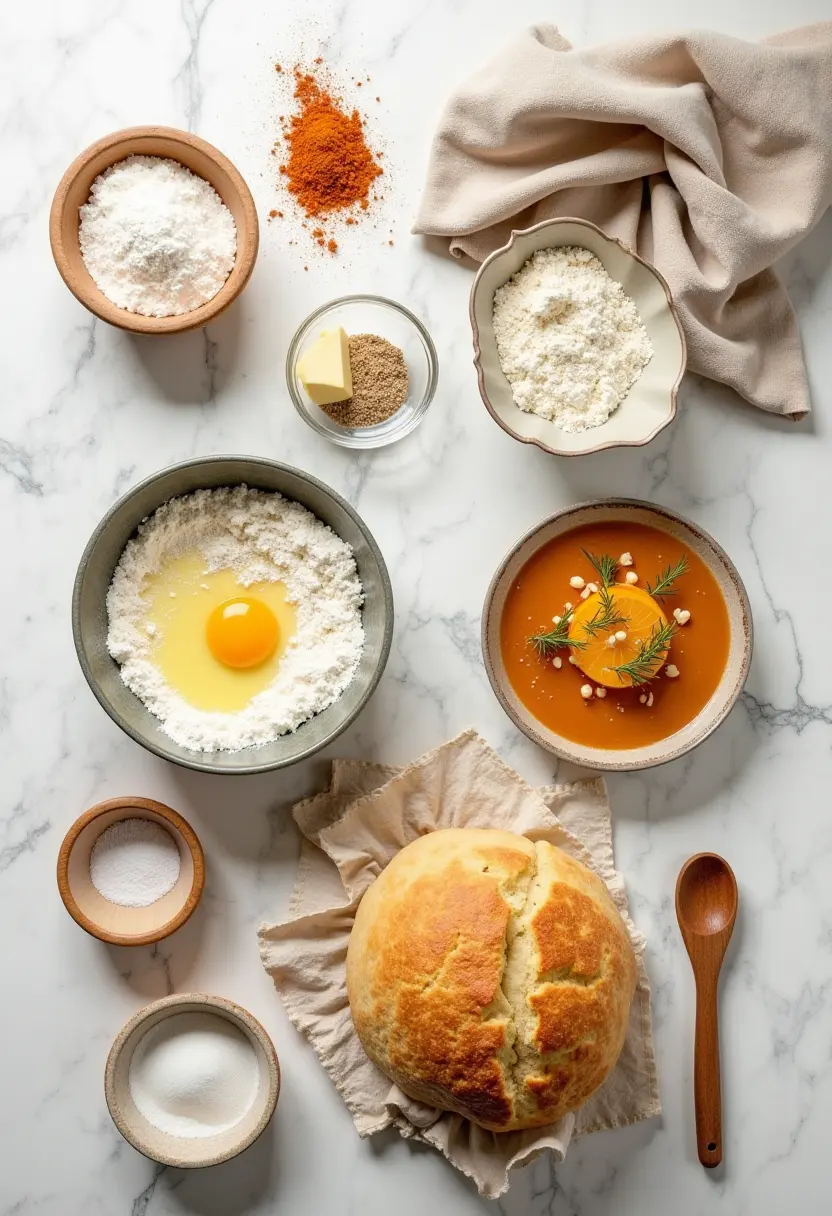
Ingredients List
Essential Ingredients
| Ingredient | Metric | Imperial | Notes |
|---|---|---|---|
| Bread Flour | 500g | 4 cups | High protein content (12-14%) creates better gluten structure |
| Warm Water | 375ml | 1½ cups + 2 tbsp | 75-80°F for optimal yeast activation |
| Active Dry Yeast | 7g | 2¼ tsp | Or 5g instant yeast (no proofing required) |
| Fine Sea Salt | 10g | 2 tsp | Enhances flavor and strengthens gluten |
| Olive Oil | 15ml | 1 tbsp | Optional: adds subtle flavor and softer crumb |
Ingredient Notes
- Flour Choice: Bread flour is crucial for achieving the proper chew and crust. All-purpose flour can substitute but results in a less chewy texture.
- Yeast Activation: If using active dry yeast, proof in warm water with a pinch of sugar for 5-10 minutes until foamy.
- Water Temperature: Too hot kills yeast; too cold slows activation. Aim for lukewarm (like a comfortable bath).
- Salt Quality: Sea salt or kosher salt provides better flavor than table salt. Avoid iodized salt, which can inhibit yeast activity.
Equipment Needed
Essential Tools
- Large mixing bowl or stand mixer with dough hook
- Kitchen scale (highly recommended for accuracy)
- Clean kitchen towels for covering dough
- Bench scraper for handling sticky dough
- Sharp knife or lame for scoring
- Spray bottle for creating steam
For Best Results
- Dutch oven with lid OR baking stone/steel with steam pan
- Instant-read thermometer for checking doneness
- Wire cooling rack
Pro Tip: A Dutch oven creates the perfect environment for steam and even heat distribution, making it the easiest method for beginners to achieve professional results.
Step-by-Step Instructions
Step 1: Prepare the Dough (15 minutes)
- Activate the yeast: In a small bowl, combine warm water with yeast. Let stand for 5-10 minutes until foamy.
- Mix dry ingredients: In a large bowl, whisk together flour and salt.
- Combine wet and dry: Pour the yeast mixture (and olive oil, if using) into the flour mixture. Stir with a wooden spoon until a shaggy dough forms—don’t worry if it looks rough.
Step 2: Develop the Gluten (10-12 minutes)
- Knead by hand: Turn dough onto a lightly floured surface. Knead for 8-10 minutes until smooth and elastic. The dough should pass the windowpane test—stretch a small piece thin enough to see light through without tearing. Alternative: Use a stand mixer with dough hook on medium speed for 6-8 minutes.
Step 3: First Rise (1-2 hours)
- Shape and rest: Form dough into a ball and place in an oiled bowl. Cover with damp towel and let rise in a warm, draft-free place until doubled in size (1-2 hours).
Step 4: Shape and Second Rise (45-60 minutes)
- Gently deflate: Turn risen dough onto lightly floured surface. Gently press out air bubbles.
- Shape the loaf: Form into a round boule or oval batard. Place seam-side down on parchment paper.
- Final rise: Cover and let rise for 45-60 minutes until increased by 50%.
Step 5: Prepare for Baking (15 minutes)
- Preheat oven: Place Dutch oven (with lid) or baking stone in oven. Preheat to 450°F (230°C) for at least 30 minutes.
- Score the loaf: Using a sharp knife or lame, make 2-3 deep slashes across the top at a 45-degree angle.
Step 6: Bake to Perfection (45-50 minutes)
- Create steam: Carefully transfer dough to hot Dutch oven using parchment paper. Cover immediately. Steam Method: If using baking stone, place loaf on stone and immediately add ice cubes to preheated pan below.
- Bake covered: 20 minutes at 450°F.
- Remove lid: Carefully remove Dutch oven lid (or steam pan). Continue baking 20-25 minutes until deep golden brown and internal temperature reaches 205-210°F.
Step 7: Cool and Enjoy
- Cool completely: Transfer to wire rack. Resist cutting for at least 1 hour—the crumb continues cooking and setting during this time.
Pro Tips for the Perfect Crusty Loaf
Advanced Techniques
- Autolyse Method: Mix flour and water first, let rest 30 minutes before adding yeast and salt. This improves gluten development and flavor.
- Cold Fermentation: After first rise, refrigerate dough overnight for deeper flavor complexity.
- Dual Temperature Baking: Start at 475°F for first 15 minutes, then reduce to 425°F for more even browning.
Steam Mastery
Expert Insight: Professional bakers inject steam into ovens. At home, a preheated Dutch oven mimics this environment perfectly, trapping steam from the dough itself.
- Dutch Oven Method: Provides consistent steam environment (recommended for beginners)
- Baking Stone + Steam Pan: Place pan on oven bottom, add boiling water when loading bread
- Ice Cube Technique: Add handful of ice cubes to hot pan for immediate steam burst
Hydration Secrets
Different hydration levels create different results:
- 70% hydration: Easier to handle, tighter crumb
- 75% hydration: Perfect balance (this recipe)
- 80%+ hydration: Very open crumb, harder to shape
Troubleshooting Common Issues
“My bread isn’t crusty enough”
Solutions:
- Increase oven temperature by 25°F
- Ensure adequate steam in first 20 minutes
- Bake longer until deep golden brown
- Cool on wire rack (not cutting board) for proper crust formation
“My dough didn’t rise”
Potential causes:
- Dead yeast: Check expiration date, proof before using
- Temperature issues: Too cold (slow rise) or too hot (killed yeast)
- Too much salt: Can inhibit yeast activity
- Old flour: Low protein flour produces weak gluten structure
“My crust is too thick/hard”
Adjustments:
- Reduce baking time slightly
- Lower oven temperature by 25°F
- Brush with melted butter immediately after baking
- Store in plastic bag once completely cooled
“Bottom of my bread is burnt”
Solutions:
- Move oven rack up one position
- Place baking sheet on rack below bread to deflect heat
- Reduce temperature and extend baking time
Delicious Variations & Add-ins
Herb Italian Bread
Add to dry ingredients:
- 2 tablespoons dried rosemary
- 1 tablespoon dried oregano
- 1 teaspoon garlic powder
Cheese Italian Bread
Fold into shaped dough before final rise:
- ½ cup grated Parmesan cheese
- ¼ cup chopped sun-dried tomatoes
Artisan Preferment Version
For deeper flavor, prepare a poolish 12-24 hours ahead:
- 100g bread flour
- 100g water
- Pinch of yeast Mix, cover, ferment at room temperature. Use in place of equal amounts of flour and water in main recipe.
Storing & Serving Suggestions
Maintaining Crustiness
- Day 1: Store uncovered at room temperature
- Day 2-3: Wrap in paper bag or clean kitchen towel
- Beyond 3 days: Freeze slices in freezer bags
Refreshing Day-Old Bread
- Lightly mist crust with water
- Bake at 350°F for 5-8 minutes
- Cool 5 minutes before serving
Serving Ideas
- Classic bruschetta with tomatoes and basil
- Rustic sandwiches with Italian meats and cheeses
- Soup companion for hearty minestrone or pasta e fagioli
- Breakfast toast with olive oil and sea salt
- Garlic bread brushed with herb butter
Printable Recipe Card
Easy Crusty Italian Bread Recipe
Prep Time: 20 minutes | Rise Time: 3 hours | Bake Time: 45 minutes | Serves: 8-10
Ingredients:
- 500g (4 cups) bread flour
- 375ml (1½ cups + 2 tbsp) warm water
- 7g (2¼ tsp) active dry yeast
- 10g (2 tsp) fine sea salt
- 15ml (1 tbsp) olive oil (optional)
Instructions:
- Proof yeast in warm water for 10 minutes
- Mix flour and salt in large bowl
- Add yeast mixture, stir to form shaggy dough
- Knead 8-10 minutes until smooth and elastic
- First rise: 1-2 hours until doubled
- Shape into boule, second rise: 45-60 minutes
- Preheat Dutch oven to 450°F
- Score loaf, bake covered 20 minutes
- Uncover, bake 20-25 minutes until golden
- Cool 1 hour before slicing
Internal temperature should reach 205-210°F
Join the Bread-Baking Community!
Did you try this crusty Italian bread recipe? I’d love to hear about your results! Share your photos in the comments below and tell me—did you achieve that perfect crackling crust? What variations did you try?
Your turn to experiment: What are your favorite ways to enjoy fresh Italian bread? Do you prefer it as a side with pasta, transformed into bruschetta, or simply savored with good olive oil and sea salt?
Don’t forget to share this recipe with fellow bread enthusiasts on social media—there’s nothing quite like the joy of homemade bread to bring people together!
More Artisan Bread Recipes You’ll Love:
- How to make honey wheat bread recipe from scratch.
- Simple date nut bread recipe for beginners.
- How to make cake mix banana bread in 3 simple steps
- How to make 2 banana bread recipe.
Happy baking, and may your kitchen always smell like fresh bread!
How do you feel
There are no reviews yet. Be the first one to write one.